Creating Datasets
Before you can visualize and explore data, you must create a dataset. Nitro Explorer is pre-loaded with several datasets but you can also create your own.
Users can create Private or Shared datasets:
- Shared datasets - Created on shared databases and accessible to other users within the organization. For example, production_v is shared database, therefore all datasets created on production_v are shared datasets.
- Private datasets - Created on user-specific databases. Cannot be accessed by anyone other than the creator. For example, production_v::modifyall<username>__v is a user-specific database, therefore all datasets created on it are private datasets.
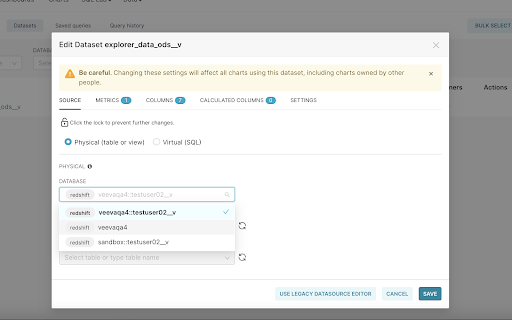
To switch the dataset from private to shared mode or vice-versa:
-
Select the Datasets tab.
-
Select Edit from the Actions column for the dataset you want to switch the database.
-
Select the appropriate user-specific or common database, depending on whether you want a private or shared dataset, from the Database drop-down menu.
-
Select Save.
If your visualization can be based on the data in Nitro without any manipulation or joining of other data, you can create a physical dataset to power the chart. If you need a more complex or derived dataset to power your chart, you must create a virtual dataset.
Duplicating a Dataset
To create a copy of an existing dataset:
-
Select the Datasets tab.
-
Select Duplicate from the Actions column for the dataset you want to copy.
-
Enter the new dataset name.
-
Select Duplicate.
Creating a Physical Dataset
To create a physical dataset:
-
Select the Datasets tab.
-
Select the + Dataset button. The New dataset page displays.
-
Select the Database and Schema for the new dataset.
-
Select the database table.
-
Select Create Dataset and Create Chart.
-
Select Upload a CSV from the Data menu on the Nitro Explorer home page.
-
Complete the required fields on the CSV to Database configuration form.
Users can upload a parquet file as a CSV by specifying the columns in the Use Columns section of the CSV to Database configuration upload form.
-
Select Save.
To upload an Excel sheet as a dataset:
-
Select Upload Excel from the Data menu on the Nitro Explorer home page.
-
Complete the required fields on the Excel to Database configuration form.
-
Select Save.
Creating a Virtual Dataset
To create a virtual dataset:
-
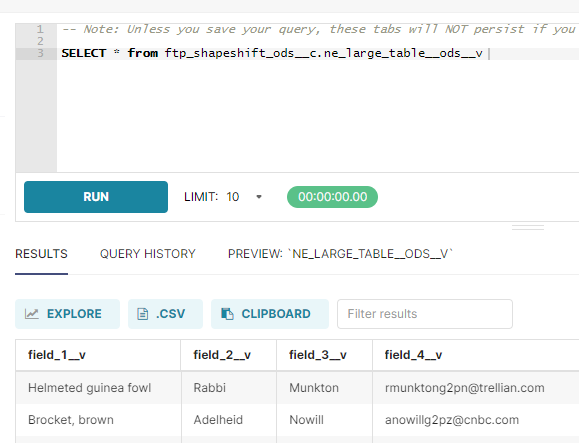
Select SQL Editor from the SQL Lab menu on the Nitro Explorer home page.
-
Create an SQL query.
-
Select Run.
-
Select the Results tab.
-
Select Explore.
-
Save the query and results as a new virtual Dataset or create a new one.
-
Specify the configuration you wish to use to visualize the data in the Chart Builder.