Nitro Table Designer
To allow users to easily extend the Nitro data model to accommodate custom reporting tables, a new table designer is available to create or update tables in the Nitro reporting layer (DDS schema) for all Nitro connectors. Users can also refresh custom tables on an ad hoc or scheduled basis.
Users can create a view or a table. Views update automatically when the source data is updated in Nitro, but tables do not. Views support simple SQL logic.
Useful Scenarios:
- Users who want to quickly expand a data model in Nitro
- Nitro users who want to easily upload specialty data from a vendor not included in Nitro’s data model
- Explorer users who want to persist a query as a standard table in Nitro
Adding a Custom Table
To add a custom reporting table to an existing schema:
-
Log into the NAC.
-
Select Inbound from the Connectors side menu.
-
Select the inbound connector you want to edit.
-
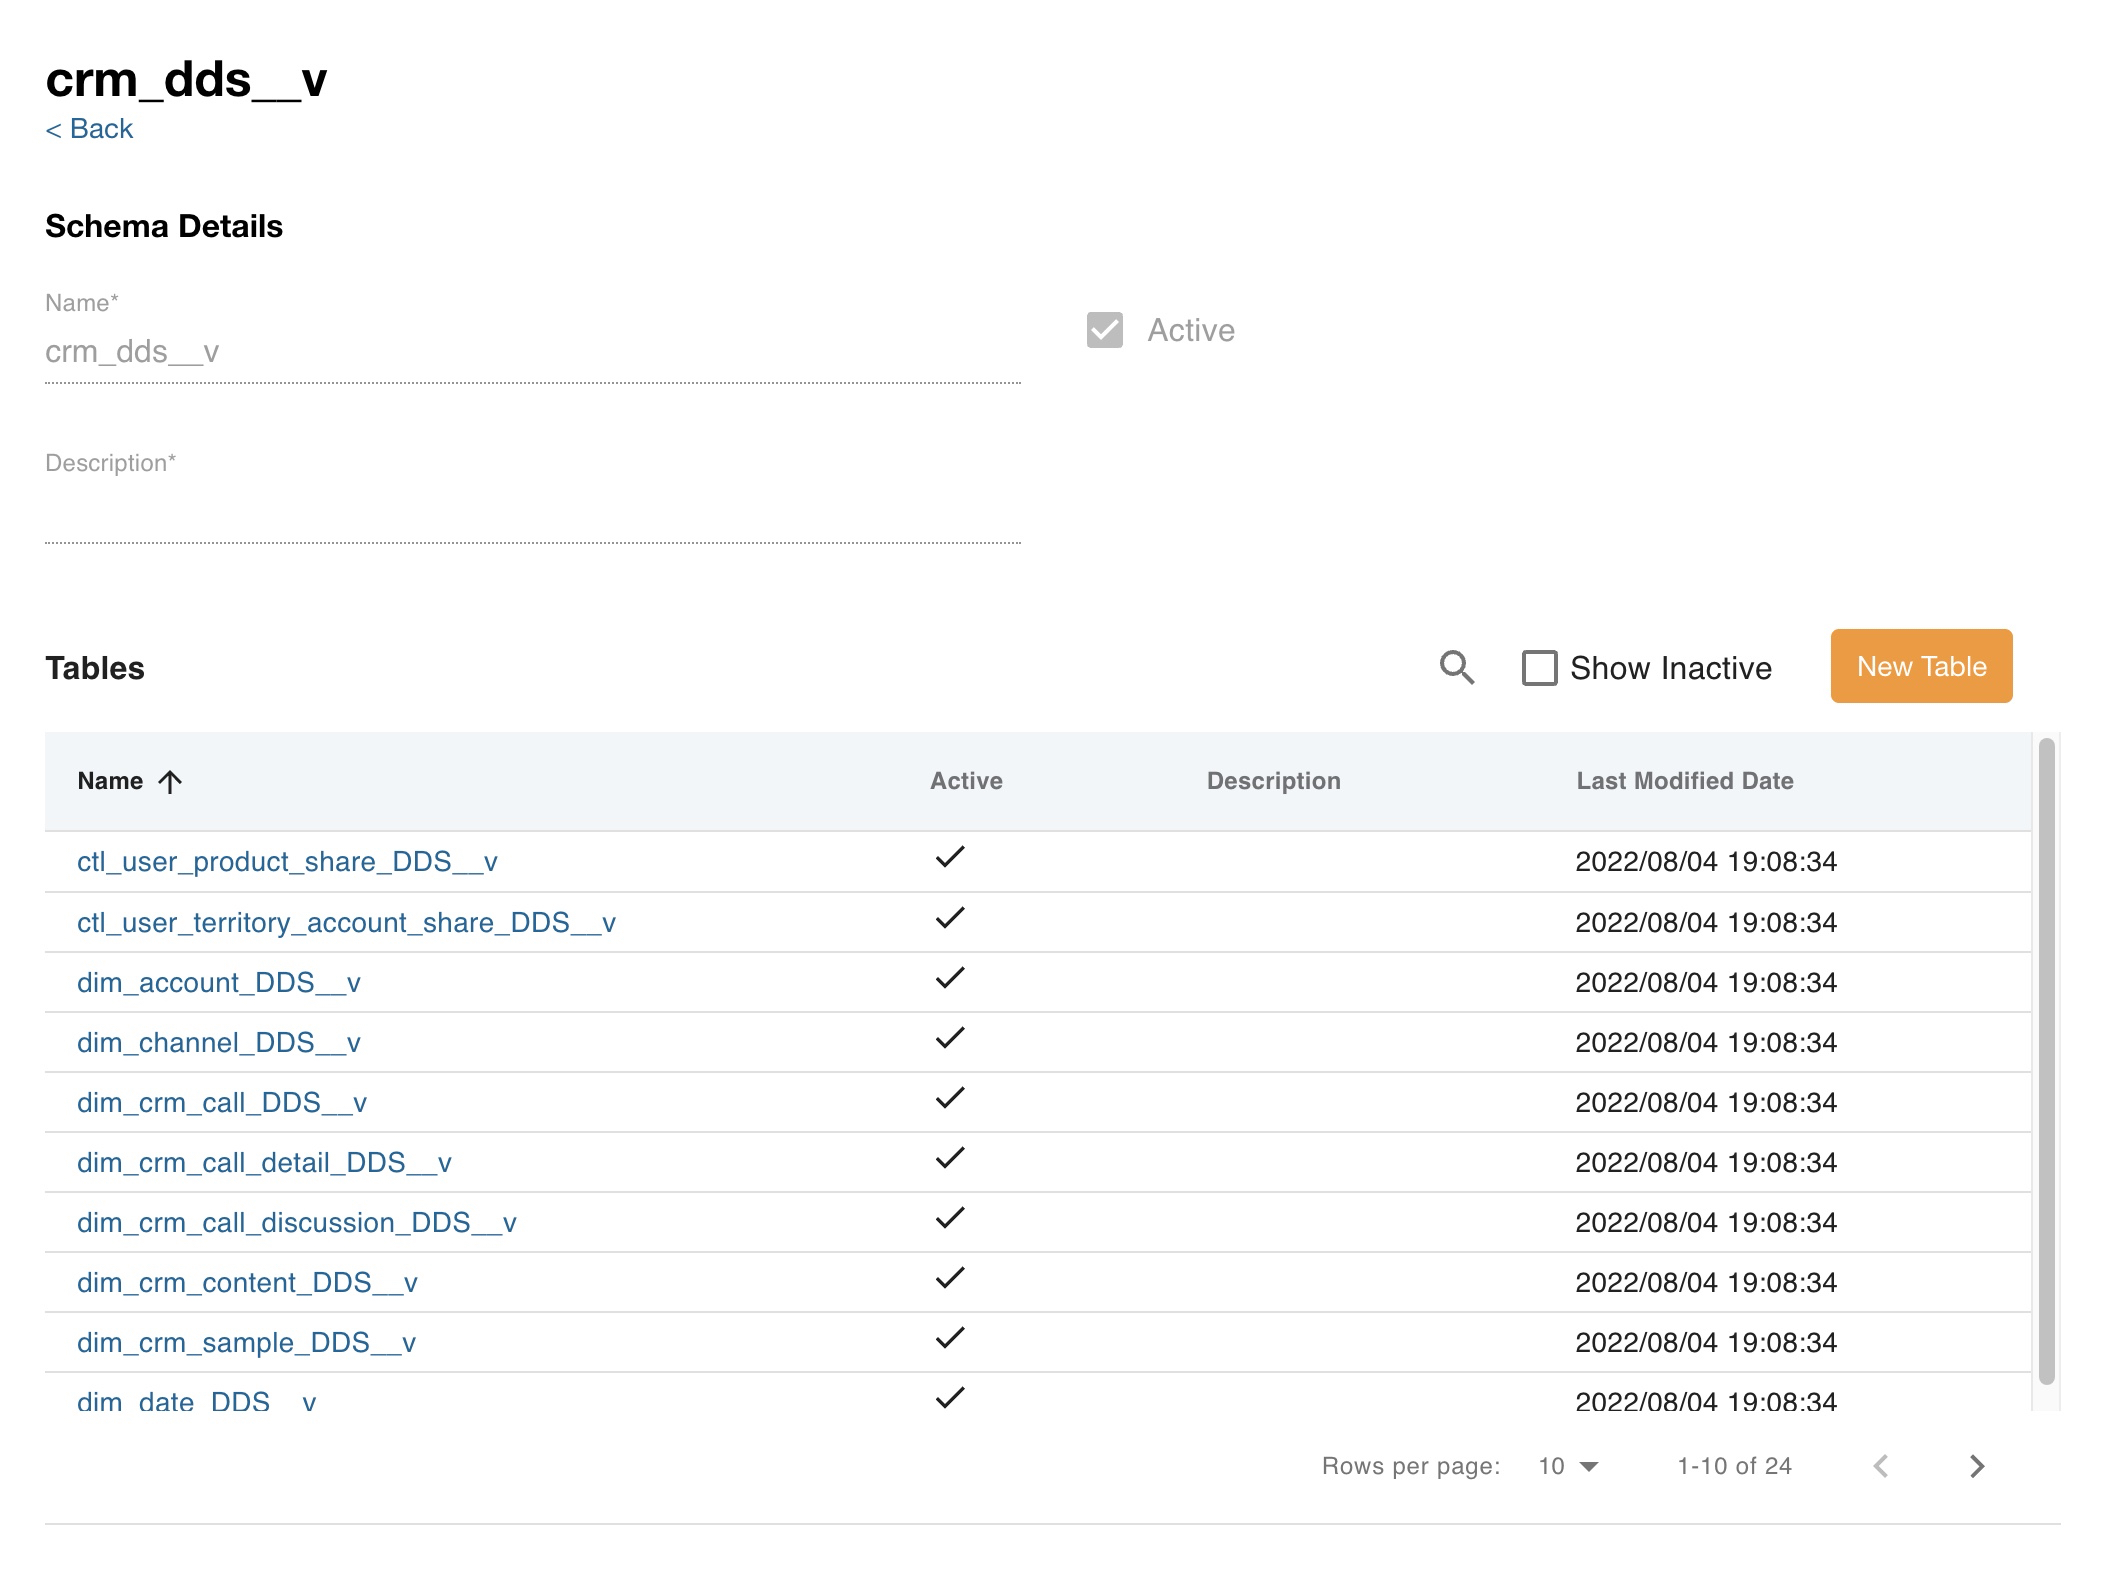
Select the DDS schema in the Connector Schemas section.
-
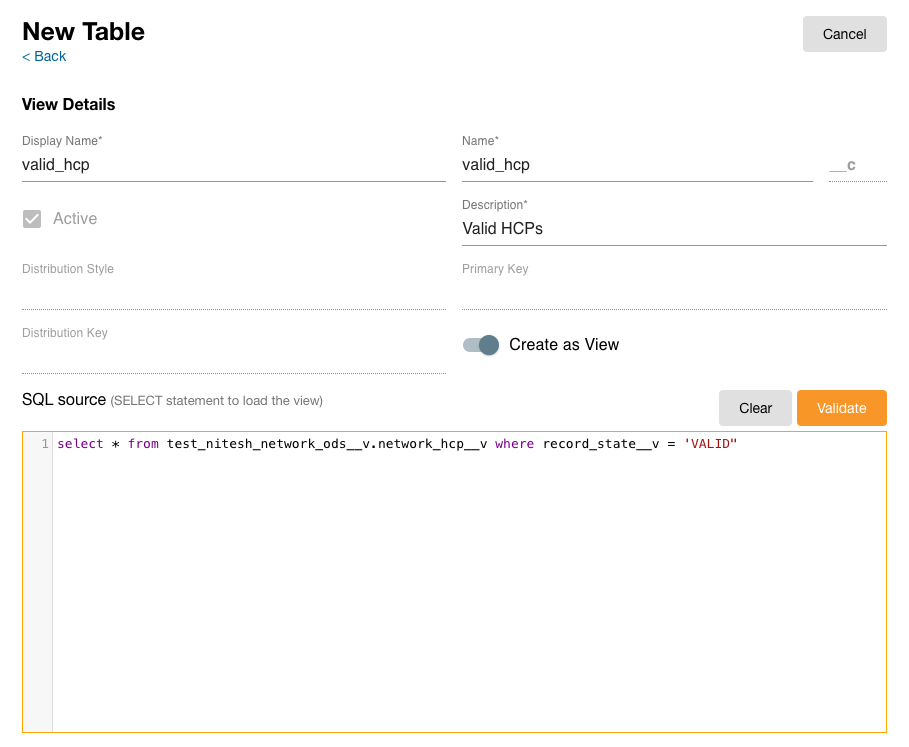
Select New Table.
-
Enter the new table required details.
-
Add the SQL query in the SQL Editor containing the logic to populate the table.
-
Select the Create as View toggle to create a view instead of a table. This step is optional.
Views cannot be built on temporary tables since temporary tables are not persisted in Nitro.
-
Select Validate.
-
Select or edit the following attributes from the Fields tab. This step is optional:
- Active check box
- Required check box
- Description
- Select Save.
- Run or schedule a job with the updated connector as needed.
Updating a Custom Table
To update an existing custom reporting table:
-
Log into the NAC.
-
Select Inbound from the Connectors side menu.
-
Select the inbound connector you want to edit.
-
Select the DDS schema in the Connector Schemas section.
-
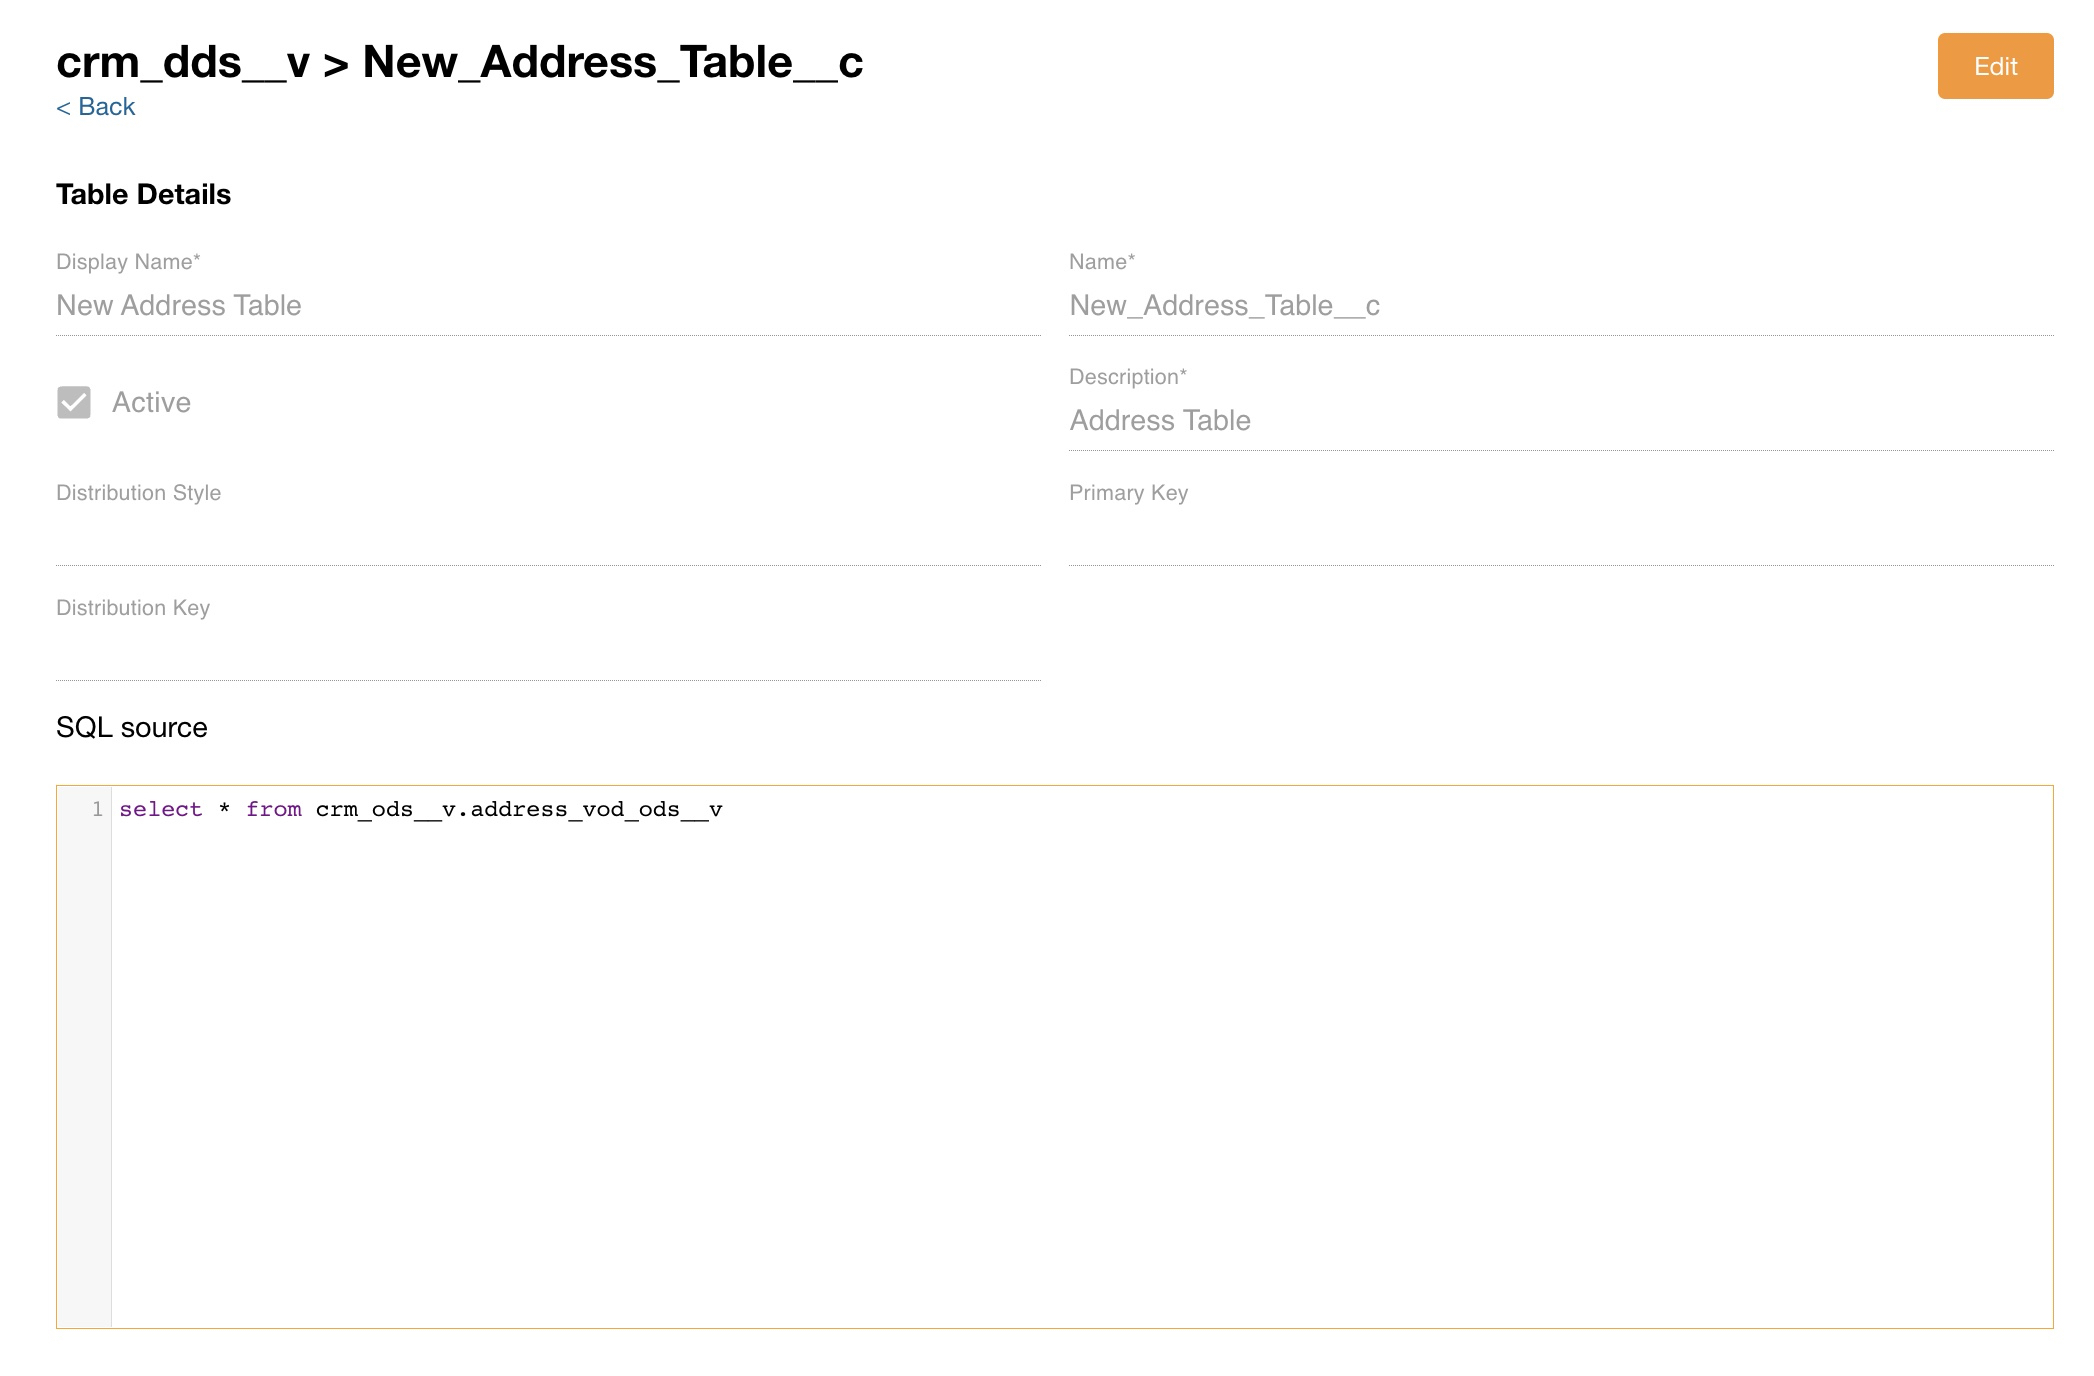
Select the table you want to update.
-
Select Edit.
-
Update the SQL query in the SQL Editor or the editable attribute fields.
-
Select Validate to regenerate the metadata. Nitro drops and re-adds the table containing the new parameters.
-
Select Save.
-
Run or schedule a job with the updated connector as needed.
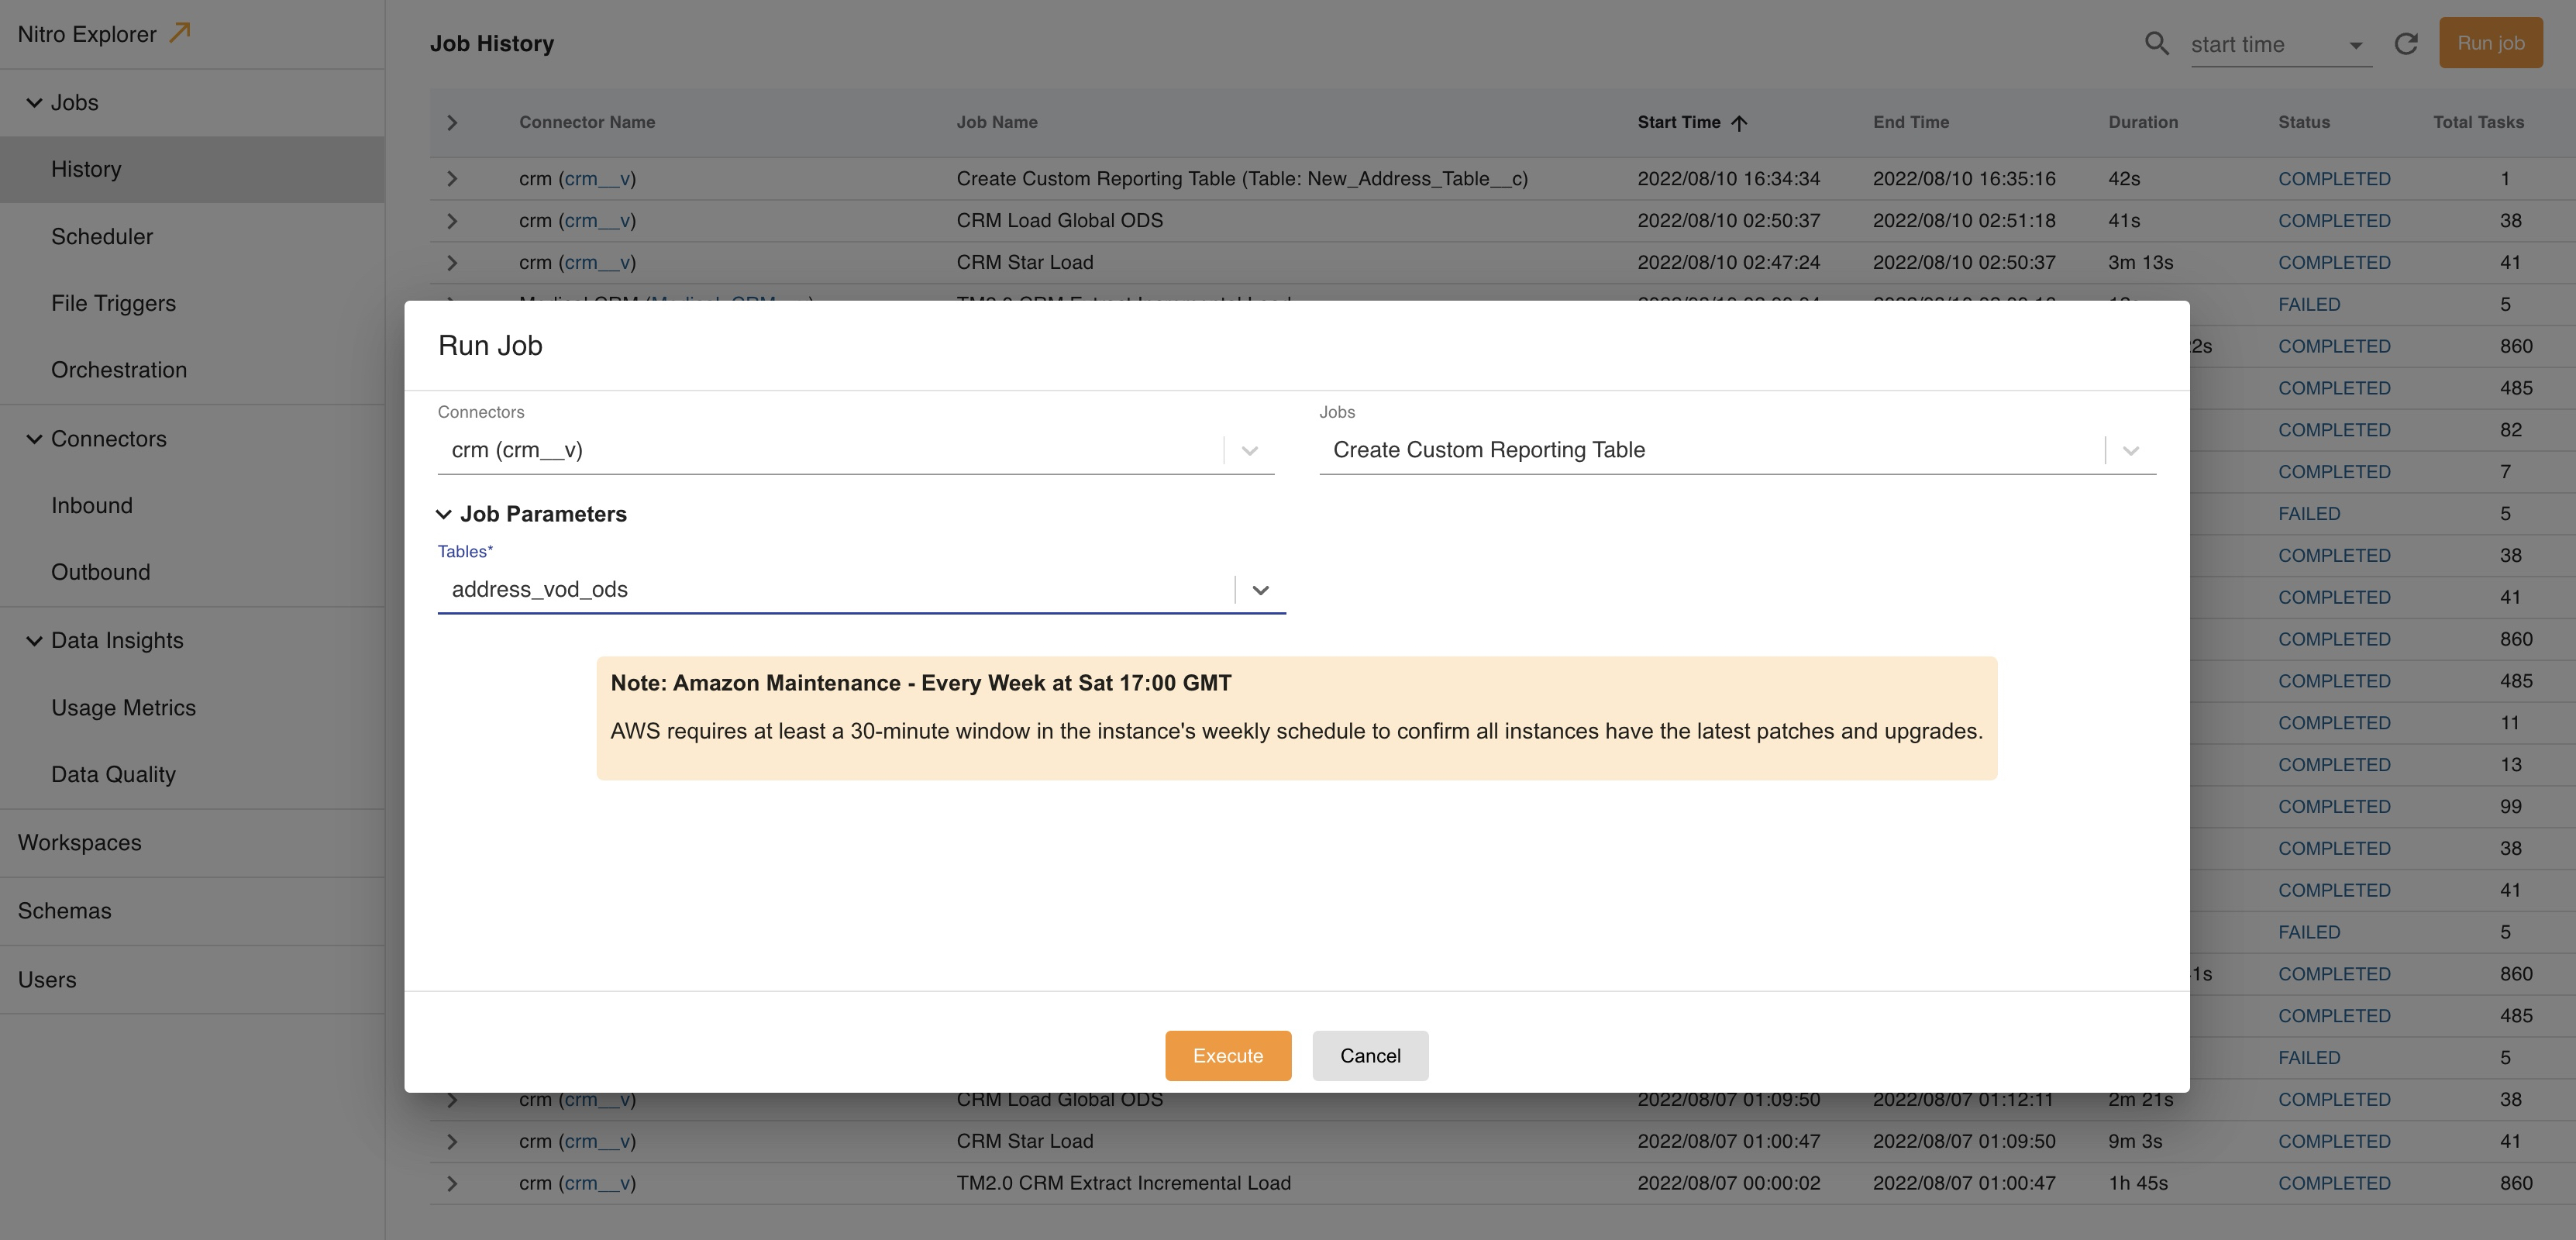
To ad hoc refresh the data in a custom reporting table:
-
Log into the NAC.
-
Select History from the Jobs side menu.
-
Select Run Job.
-
Select the connector and job you want to refresh.
-
Select the table to refresh.
-
Select Execute.
Deleting a Custom Table
To remove a custom reporting table:
- Log into the NAC.
- Select Connectors > Inbound from the side menu.
- Select the appropriate inbound connector.
- Select the DDS schema in the Connector Schemas section.
- Select the table to be deleted from the schema (must have an __c extension). The Table Details page opens.
- Select the Delete button.
- Select Yes to confirm deletion.