Pushing Nitro Data to CRM
Nitro can push data to CRM using the CRM Outbound Connector. When Nitro data is available in the CRM database, it can be used in native business processes in CRM.
For example, HCP-level targeting and segmentation is derived in Nitro from multiple commercial data sources. This insight needs to be tied directly to HCPs in CRM for pre-call planning and other advanced profiling workflows. To do this, admins must map Nitro source tables to CRM target tables.
To push Nitro data to CRM:
-
Log into the NAC.
-
Select Outbound Connector from the Connectors menu.
-
Select the New Connector button.
-
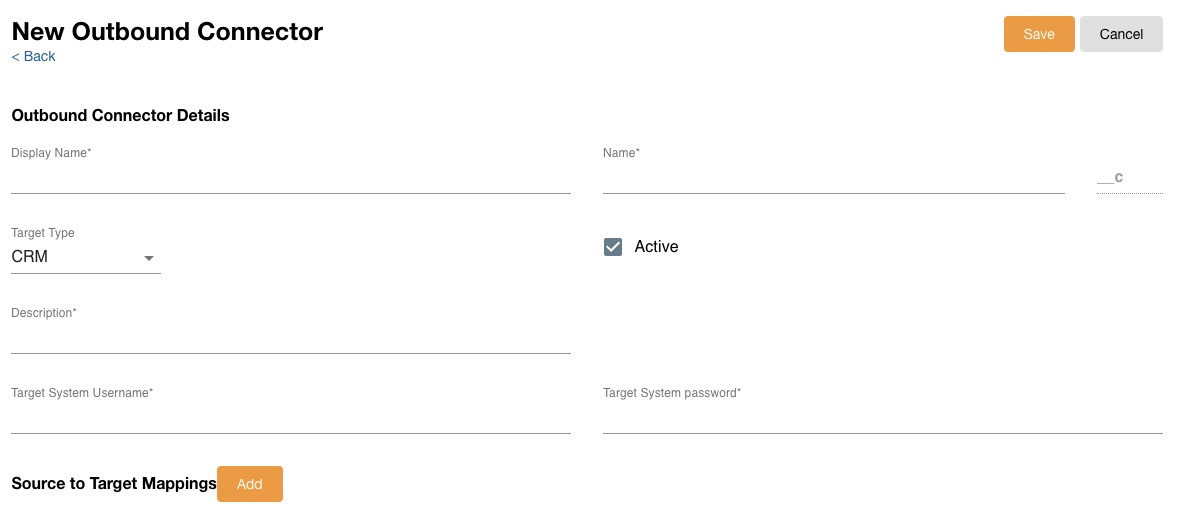
Enter the following details in the Outbound Connector Details section:
- Display Name
- Name
- Target Type - CRM
- Description
- Target System Username
- Target System password
-
Select Add in the Source to Target Mappings section.
-
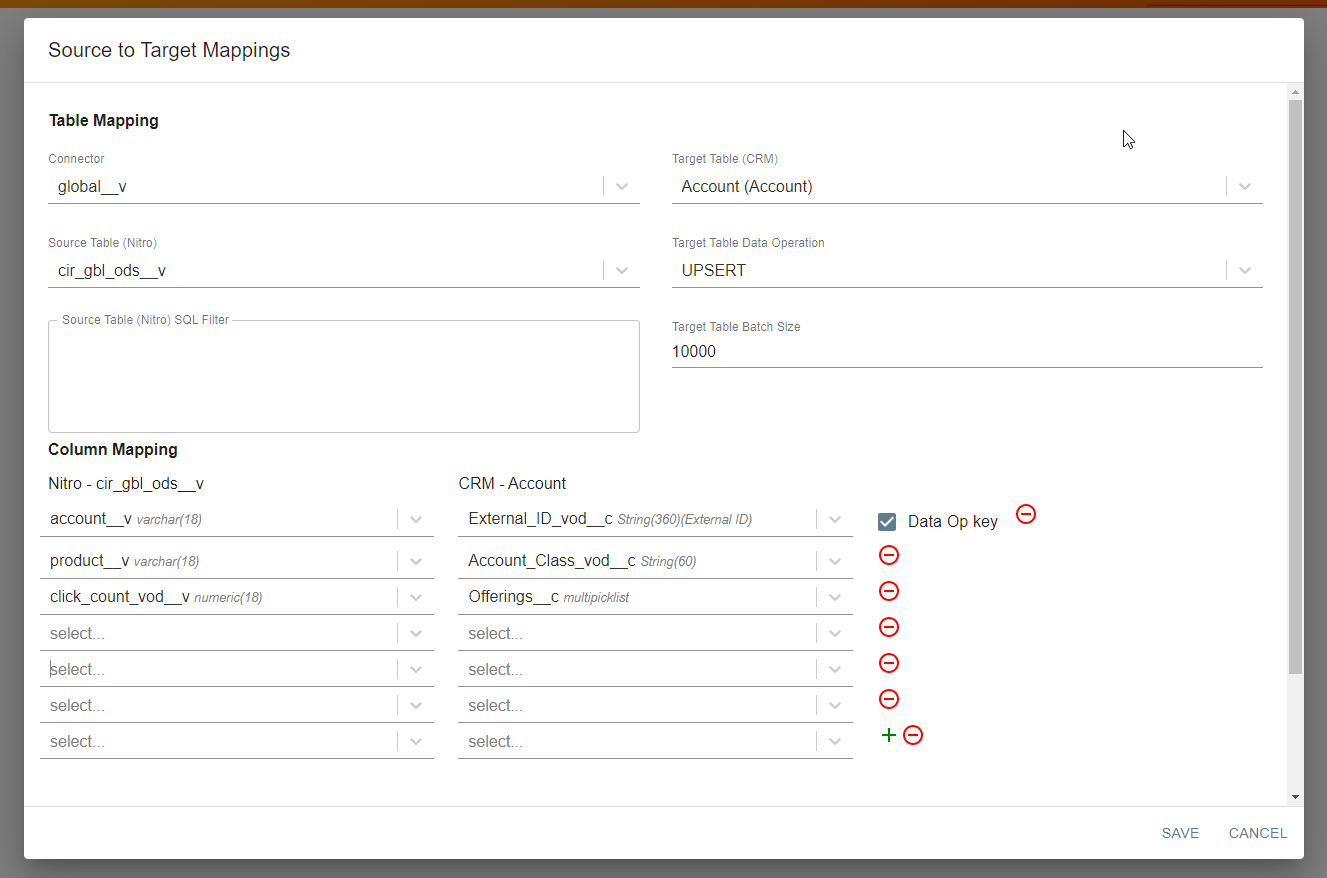
Select the following items in the Table Mapping section:
- Connector - INBOUND and GLOBAL connectors in the Nitro instance
- Source Table (Nitro) - Tables in the connector selected above in the ODS, DDS, schemas
- Target Table (CRM) - Dynamically generated list of tables from the target CRM credentials that are apart of the header Outbound Connector record
- Target Table Data Operation - INSERT, UPDATE or UPSERT
- Target Table Batch Size - Size of the batch to be sent to Salesforce.com bulk API. Default is 10,000
- Specify an SQL WHERE clause to filter data from the source table in the Source Table (Nitro) SQL Filter.
- Select columns in the Column Mapping section for the specified Nitro source table and from the CRM target table. Required fields are determined by the CRM security model and the data operation selected.
- If the Target Data Operation is UPDATE, the ID field is selected and cannot be deselected
- If the Target Data Operation is INSERT, the ID field does not display
- If Target Data Operation is UPSERT, the ID field appears as an option and the Data Op Key check box displays
- Select Save.
- Select the Verify Connection button to test the credentials entered. This step is optional.
Only writable objects are available to select from the CRM target table.
For example:
To load data to CRM for an object that references other objects in CRM via a foreign key, select the caret (if available) to expand the column selection to include relationship objects.
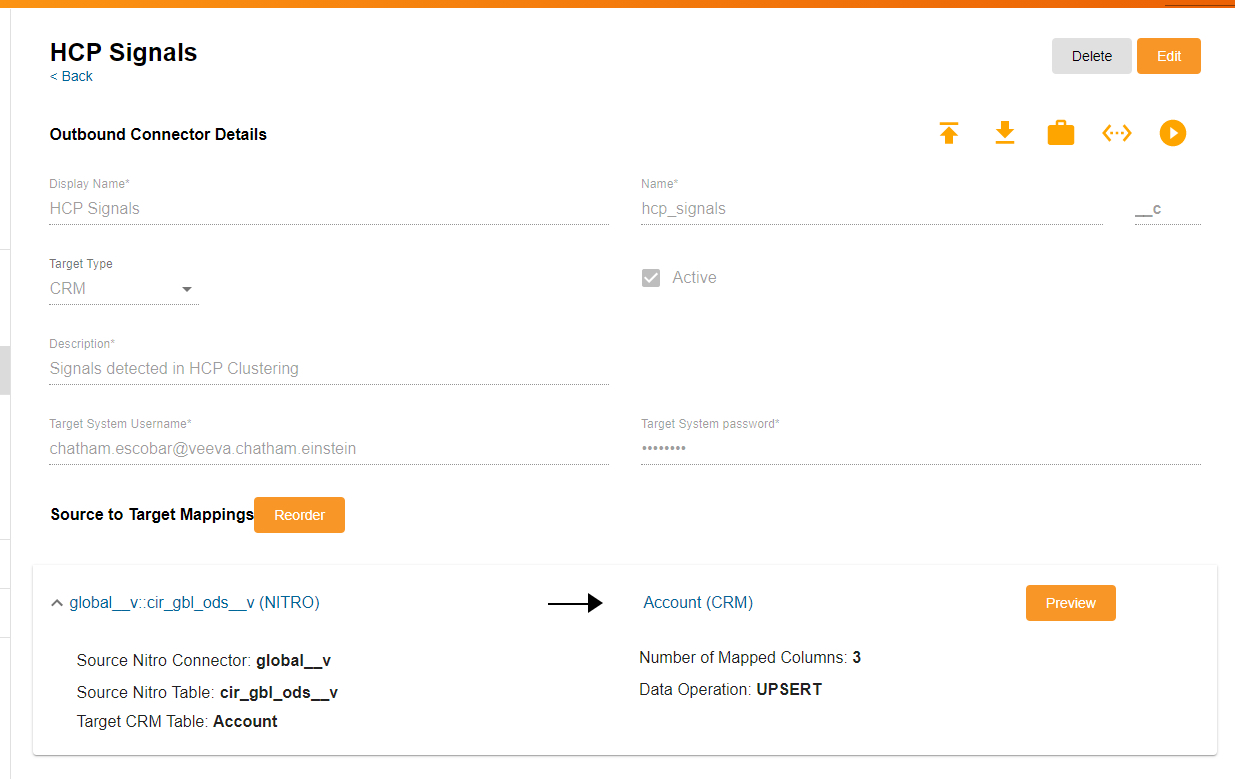
Admins can run a CRM Outbound Connector job as Ad Hoc, scheduled, or as part of a Job Orchestration, then view the results and outputs of the job in the Job History console.
Admins can reorder the source-to-target mappings to change the order in which they are processed by editing the connector.