Pushing Nitro Data to Vault
A Push to Vault outbound connector is available allowing admins to push Nitro data to Vault. When Nitro data is available in the Vault platform, it can be used to drive Vault-specific workflows and business processes. For example, Nitro users can derive CRM usage of documents and HCP deciling/segmentation using multiple commercial data sources. These insights can then be tied to content and HCPs in PromoMats and Align, respectively.
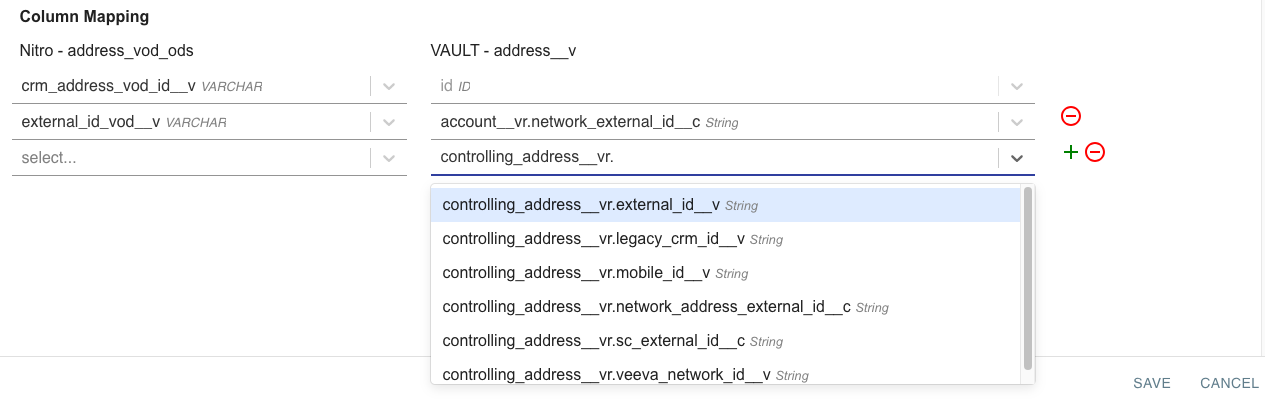
Users can specify a foreign key in outbound jobs to Vault when loading to a reference field. This allows users to load records that contain references when the Vault ID for the record isn’t known. When creating the mapping for the outbound job, any unique field on the referenced object can be selected in place of the Vault ID.
The Vault outbound connector only supports custom Vault Objects and Documents.
The Veeva VAULT outbound connector uses the Vault REST API v21.3.
To push Nitro data to Vault:
-
Log into the NAC.
-
Select Outbound Connector from the Connectors menu.
-
Select the New Connector button.
-
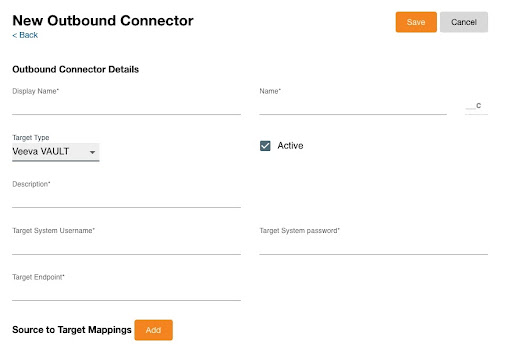
Enter data for the required fields in the Outbound Connector Details section:
- Display Name
- Target Type - select Veeva VAULT
- Description
- Target System Username - Vault username
- Target System password - Vault password
- Target Endpoint
-
Ensure the Active check box is selected.
-
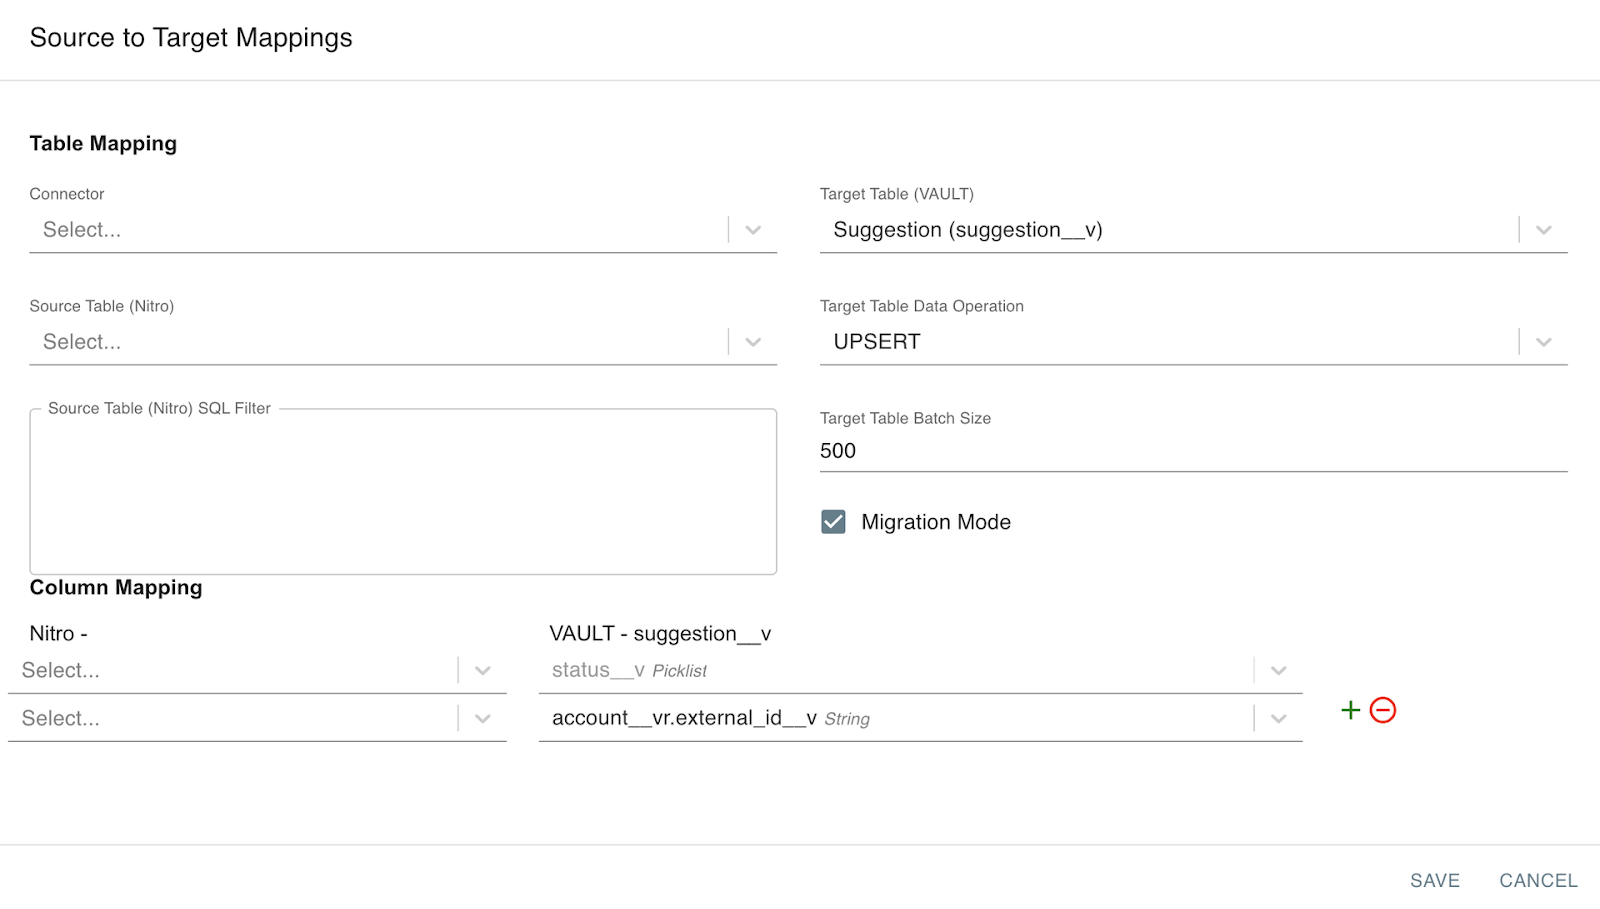
Select the following values in the Table Mapping section:
- Connector - Nitro connector
- Target Table (VAULT)
- Source Table (Nitro)
- Target Table Data Operation - UPSERT, UPDATE, or INSERT
Only UPDATE operation is supported for Documents.
- Select the Migration Mode check box to allow the data to bypass some data restrictions. This can improve loading performance when there are over 100,000 records to migrate. This step is optional.
-
Add a Source Table (Nitro) SQL Filter. This step is optional.
The Target Table Batch Size is a value from 1-500.
-
Select specific columns to map from the Nitro table selected above to the Vault table selected above in the Column Mapping section. Add rows as needed by selecting the + button.
- Select Save.
Admins can also select the Import Connector button to import a Veeva VAULT outbound connector configuration.
Admins can run a Veeva VAULT outbound connector job as ad hoc, scheduled, or as part of a Job Orchestration, then view the results and outputs of the job in the Job History console.
Admins can reorder the source-to-target mappings to change the order in which they are processed by editing the connector. Select the Preview button to view the first 100 rows and columns of the source query.
Workflows, Workflow Tasks and Workflow Task Items
Nitro can report on the time it takes a Veeva Vault document to process through a workflow for approval. This allows document owners to track the current tasks and status of each workflow. Using Vault connectors, records from active and inactive tables are merged into the workflow__sys, workflow_task__sys, and workflow_task_item__sys tables.
The following objects are added to the Vault allow list:
- Active_workflow__sys
- Inactive_workflow__sys
- Active_workflow_task__sys
- Inactive_workflow_task__sys
- Active_workflow_task_item__sys
- Inactive_workflow_task_item__sys