Creating a Custom Connector Using Remote Pull
Nitro users can pull data using inbound connectors for AWS Simple Storage Service (S3) and SFTP (Secure File Transfer Protocol).
Pulling Data from AWS S3
System admins can configure a custom inbound connector to source data directly from the data vendor’s S3 data lake to the Nitro data lake. This replaces the need for customers to stage their data in costly SFTP locations.
Nitro has customer-specific IAM roles to provide better data governance and security in the data lake. For data exchange between a source and Nitro, this role requires list and get permissions to the specific data folder in the source S3 bucket. If you are unsure of how to manage S3 bucket permissions, see the AWS documentation for managing bucket policies.
To allow users to upload large files using S3 without the system timing out, the Nitro AWS role timeout value is 12 hours.
To create an inbound connector:
- Log into the NAC.
- Select Connectors > Inbound Connectors from the side menu.
- Select the New Connector button.
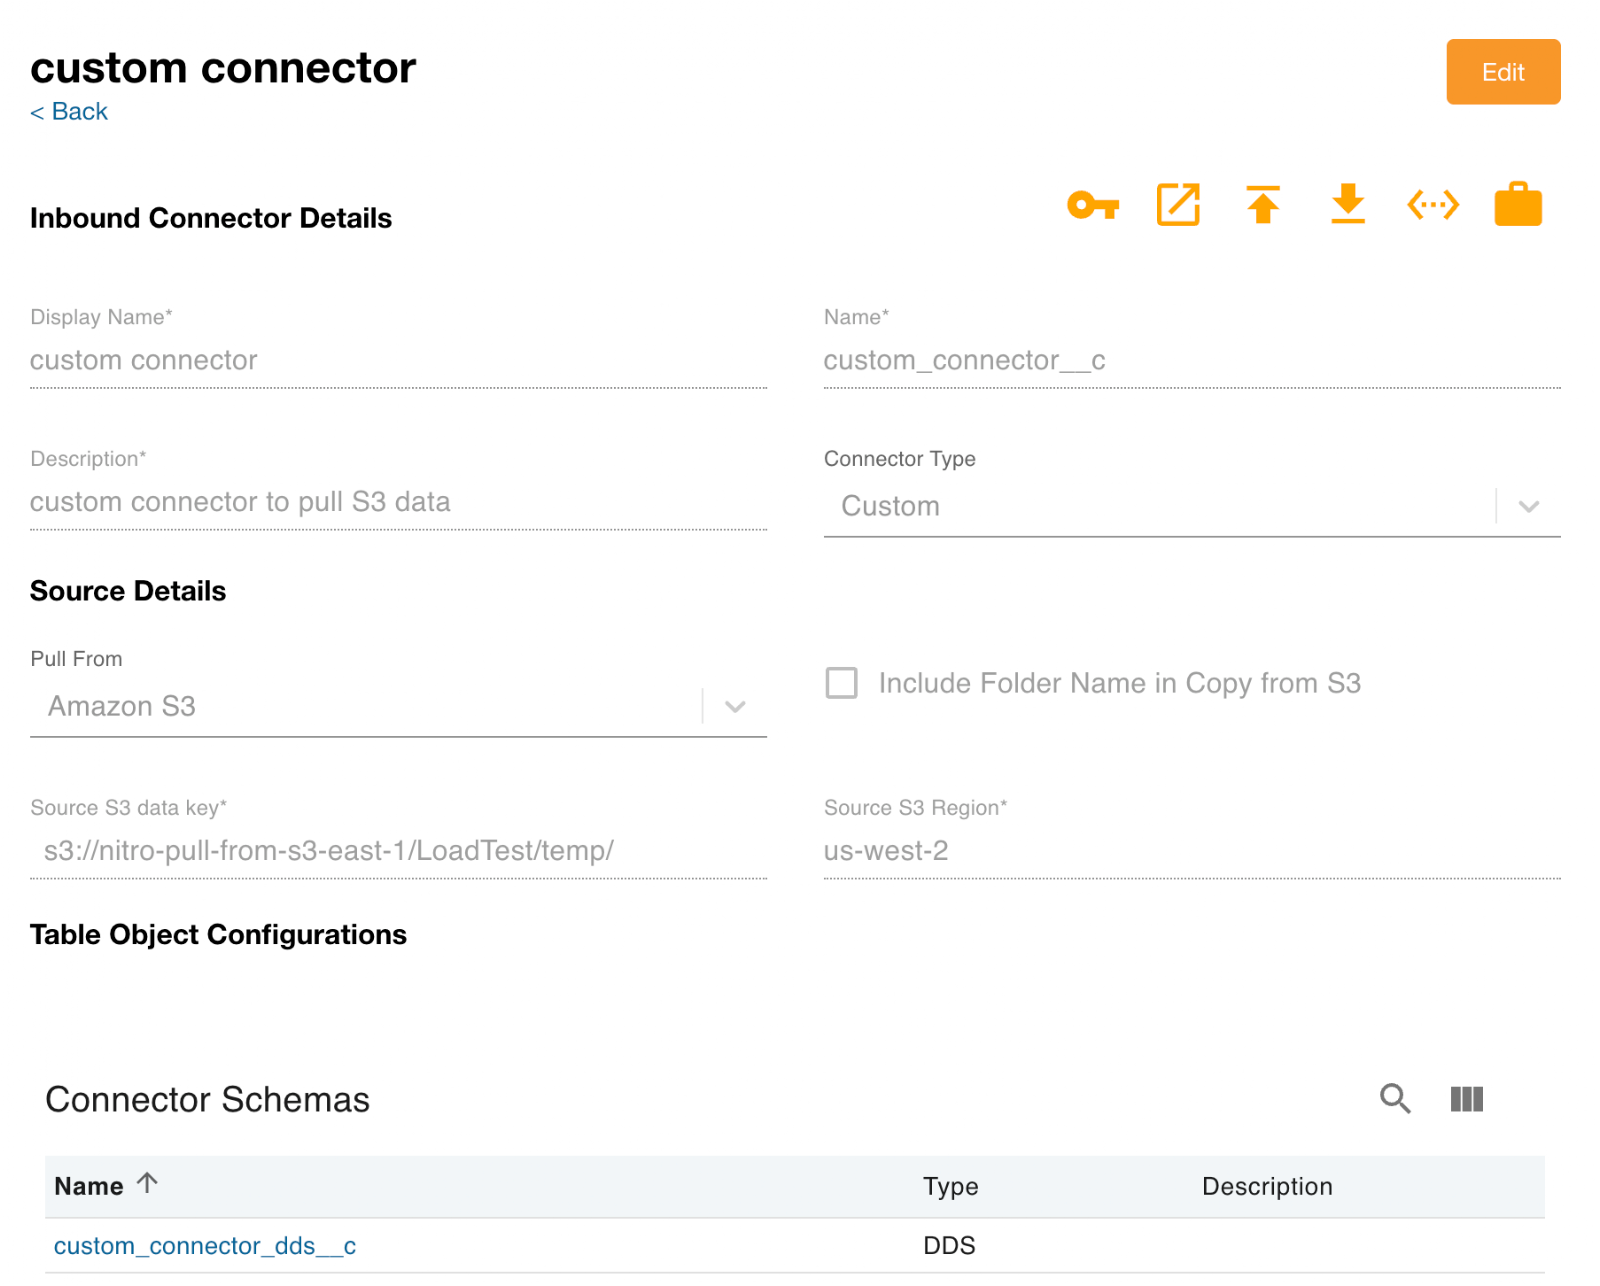
- Complete the Inbound Connector Details fields.
- Select Custom as the Connector Type.
-
Select Amazon S3 from the Pull From drop-down menu.
- Select Include Folder Name in Copy from S3 to append folder names to the file names when only net new files are pulled into Nitro.
This step is optional.
When this option is selected, you must use the FTP/Data Lake Connector Load job. Do not use the FTP/Data Lake Intelligent Load job.
-
Complete the Source S3 data key and Source S3 Region fields with your system's information. Optionally, admins can specify the file extension or regex pattern they want to use. The following folder designations are available:
If your bucket name prefix does not match the displayed bucket name prefix, submit a support ticket. Include the name of your source bucket name and request that it be added to the allowlist.
Source S3 Data Key Designation
Description
s3://veevaQA-myBucket
The entire contents of the bucket are processed.
s3://veevaQA-myBucket/myFolder
All files in the specified folder are copied. The folder name can be specified with or without a forward slash (/).
s3://veevaQA-myBucket/myFolder/*.csv
Only uncompressed or compressed files in the specified folder with file-type extension of .csv are copied.
s3://veevaQA-myBucket/myFolder/myfiles*.csv;*.json
Only uncompressed and compressed files in the specified folder with file-type extension of .csv and/or .json are copied.
s3://veevaQA-myBucket/myFolder/regex("^(.*)(?=_PA_)")
Only files in the specified folder with filenames matching the regular expression are copied.
s3://veevaQA-myBucket/myFolder/regex("^(.*)(?=_PA_)");*.json
Only files in the specified folder with filenames matching the regular expression and/or with a file-type extension of .json are copied.
-
Select Save.
-
Select the Key icon.
-
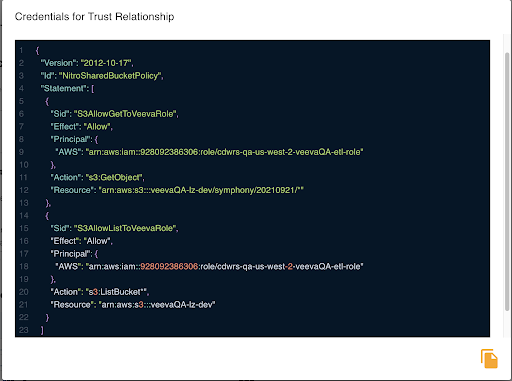
Select the Copy icon.
-
Paste this information into an existing or new S3 bucket policy to modify the trust relationship configuration of your AWS S3 bucket.
-
Return to the Inbound Connector page in Nitro and select the Verify Connection icon. This step is optional.
Pull All Files by Object Using S3 Pull
To configure a scheduled job to pull all files from the source S3 folder, specify the table object configurations and use the Nitro Remote Pull Files job and FTP/Data Lake intelligent Load job in a job orchestration.
Detect and Pull New Files by Object Using Enable S3 Pull
To configure a scheduled job to detect what was copied and successfully loaded for a given table object and only copy new files, specify the table object configurations and use the FTP/Data Lake Connector Load job.
Pulling Data from SFTP
System admins can configure an inbound connector to source data directly from the data vendor’s SFTP or customer’s internal SFTP to the Nitro data lake. This automates the process to pull files from an SFTP server.
To enable SFTP Pull:
- Log into the NAC.
- Select Connectors > Inbound Connectors from the side menu.
- Select the New Connector button.
- Complete the Inbound Connector Details fields.
- Select Custom as the Connector Type.
- Select SFTP from the Pull From drop-down menu.

- Select Include Folder Name in Copy from SFTP to append folder names to the file names when only net new files are pulled into Nitro. This step is optional.
When this option is selected, you must use the FTP/Data Lake Connector Load job. Do not use the FTP/Data Lake Intelligent Load job.
- Enter the following information for the connector:
- Source Endpoint - The endpoint for the SFTP server
- Port - The SFTP port
- User - Username for the SFTP server
- Password - Password for the user
- Select Save.
- Return to the Inbound Connector page and select the Verify Connection icon. This step is optional.
Pull All Files by Object Using SFTP Pull
To configure a scheduled job to pull all files from the source SFTP folder, specify the table object configurations and use the Nitro Remote Pull Files job and FTP/Data Lake intelligent Load job in a job orchestration.
Detect and Pull New Files by Object Using SFTP Pull
To configure a scheduled job to detect what was copied and successfully loaded for a given table object and only copy new files, specify the table object configurations and use the FTP/Data Lake Connector Load job.