Veeva Network Intelligent Sync Connector
Nitro Intelligent Sync for Veeva Network (Network IS) provides a flexible interface to automatically integrate with all of the objects configured in a Veeva Network implementation. Using Network IS, a connector automatically detects, profiles, extracts, and loads each of the objects, changing the connector table and attribute list based on the attributes configured in Network.
Network has the following exceptions:
- v7.0+ must be used for reference data
- Disallow lists are not supported
Configuring Network Intelligent Sync Connectors
Prerequisites
The inbound connector must be of type “Integration User” set on the Network User page. Nitro integration is configured in Network with Target Subscription. Select Export All Objects and Fields in the section for File and Field Selection.
To configure a new connector:
- Log into the NAC.
-
Select Connectors > Inbound from the side menu.
- Select New Connector.
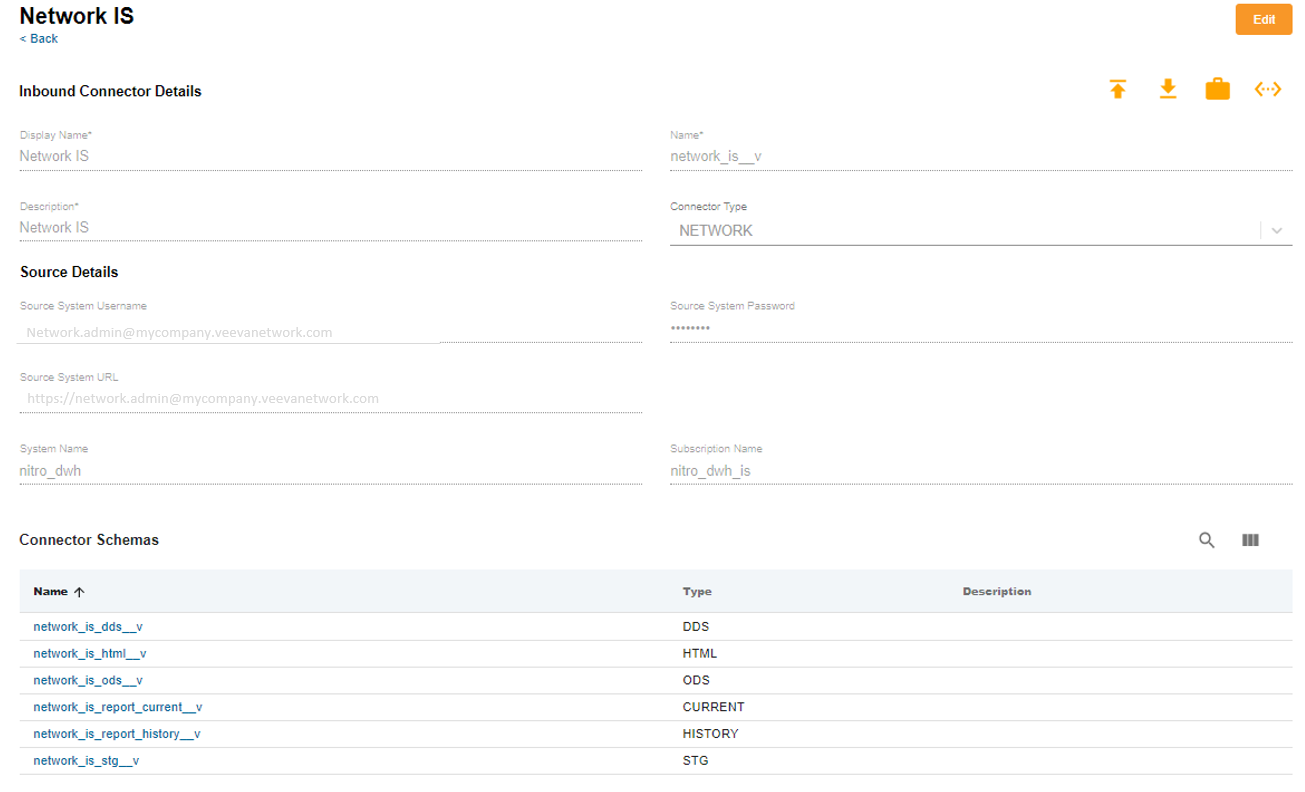
- Enter the following information:
Attribute
Description
Display Name
Name of the Nitro Connector, as it will be displayed in the Admin Console
Name
Name of the connector object as it will be referred to inside Nitro. For example, if the connector is named “network_is__v” the derived ODS schema will be “network_is_ods__v”
Description
Narrative description of the connect purpose
Connector Type
Select NETWORK (do not select NETWORK_FTP)
Source System Username
User ID for the Network Integration User. Used to log into Network to access and configure data. Ensure the following:
- Network user must be of type 'Integration User'
- Metadata Access must be set to 'Full Access' on the User page in Network under Additional Permissions
Source System Password
Network password
Source System URL
Company-specific URL used to log into and integrate to Network. For example, https://network.admin@mycompany.veevanetwork.com
“https://” is a required value for this field. Enter only the source system URL after “https://."
System Name
Name of System Configured inside Network that will be used to access data
Subscription Name
Name of the Outbound Subscription configured inside Network that will be used to access data. Typically configured specifically for Nitro to support Nitro oriented integrations.
-
Test the connector by selecting the
 button to confirm the settings properly integrate to Network. A properly configured connector receives a success message.
Running Network IS Jobs
There are two ways to load data incrementally using the Network IS Connector:
- Select the Network IS connector on the Job History page, select Run Job, then select Network Sync Load

-
From the CLI, run the jb_network_ExtractLoad__v job:
Copy
cdw etl run job --name=jb_network_ExtractLoad__v   --profile=prod-us
--tenant-name=myCluster --connector-name=network_is__v
Users can also download all of the data from Network. From the CLI, run the same command line instruction as above, but add the IS_sourceExtractModel parameter:
cdw etl run job --name=jb_network_ExtractLoad__v   --profile=prod-us
--tenant-name=myCluster --connector-name=network_is__v
--var="IS_sourceExtractModel=FULL"
Network Object Lists
Network IS provides automatic “shape shifting,” incremental load, and new object detection like other Intelligent Sync connectors. However, it also automatically detects new objects not explicitly defined in the allowlist, and automatically extracts those objects as part of each data load. This means as new custom objects are added to the Network object repository, Nitro automatically pulls these into the local repository.
By default, Network IS includes three allowlists, and one special object definition:
|
Object Name |
Description |
Load Technique |
|---|---|---|
|
Default |
By Default, Nitro Network IS integrates to ALL Network objects, using the “Default” allowlist configuration, including custom objects. This includes common Network objects, like HCO, HCP, ADDRESS, LICENSE. All of these objects are configured to use a consistent, common load model. If an object needs to have a different behavior, or needs to be disabled from intelligent sync integration, then a specific allowlist object should be created for that object, like the ones below. |
History |
|
CUSTOMKEY |
Special configuration specifically for the CUSTOMKEY object |
History |
|
PARENTHCO |
Special configuration specifically for the PARENTHCO object |
History |
|
REFERENCE |
The Network Reference object does not use an allowlist for configuration -- instead, must be configured using Table Object definitions, network_reference_STG and network_reference_ODS |
Latest |
If any object requires specialized configuration by Network IS for a particular Network implementation, new allowlist objects may be created, and ] supersedes the “Default” usage for that object. For example, if the Network HCO object included a special column that needed to be ignored by Nitro, a new HCO allowlist object should be added to the allowlist set. Nitro will pay attention to the configuration defined in the new HCO allowlist, instead of using the configuration defined in Default.
Allowlist object configurations can be used for several types of configurations, such as disabling download of a specific object, and can be done by creating an allowlist yml object, in the name of the Network source object, and uploading it to the MDS for the Network IS Connector.
For example, if you need to skip integration of the Network HCO object, create a file named HCO.yml in your allowists/NETWORK directory, with the attribute “enabled: false”, and that file will be skipped during the next load process.
Required Network Configurations
The Network IS connector leverages a target subscription within the source Network application to sync data. Veeva recommends that a separate Network System entity and Target subscription specific to Nitro be set up for this integration. The following are the recommended settings to be configured as a part of the target subscription in Network:
- Network General Export Options
- Full Data Extract set to Delta
- Record Type set to All
- Record State set to All
- Unmapped Reference Codes set to Keep Original Code
- Reference Data
- Include Reference Data Files set to True
- Reference File Version set to 7.5
- File Format
- Format set to CSV
- Delimiter set to |
- Include Header Row set to True
- Text Qualifier set to “
- File and Field Selection
- All objects set to Export All Fields
- All objects set to Export All Records
- Job Trigger Configuration
- Schedule set to Manual
Network Reporting Schemas
Views created in the reporting schema (report_current and report_history) show all records, regardless of the underlying Open Data record state. This saves users time and effort when gathering information.